
The all black task chair… such a common item in RFPs and projects! How can something so ubiquitous be so hard to render??? A lot of times, anything all black will render looking like a blob. It can be really hard to get the definition of the object to show up without washing out your other finishes.
So, before we go any further, here is my first piece of advice:
If you can get away with it (i.e. finishes are not selected yet or you are doing preliminary renderings) use a grey fabric and grey finishes. The chair you are rendering will look so much better. Then you can skip the steps below.
If you have to show a black chair (as I do most times) to create an accurate rendering, here are a few tips I have learned:
In Photo Lab- use Outline overlay. It will help crisp up the lines (a little bit)
In Post Processing- play with the contrast setting below 0. Sometimes lowering the contrast can make the black look less harsh. I find this works best for a single product image. However, in a workstation typical, this can make the other finishes too washed out.
Use the Spotlight. (Found in the 3D Tab, under Lights) If I am rendering all black seating within a typical, I like to use this method. Insert a spotlight. Then set the overall elevation to be around 3-4 feet and the target to be right at about Seat Height. In Light Settings, I typically lower the Brightness to about 250. You may have to play with the settings to get it right. Also, make you’re your cone encompasses your whole typical. This will keep you from getting weird shadows. See images below- one was with the spotlight, one was without. This helps the mesh pop on the task chair and show the details more clearly. See example below.
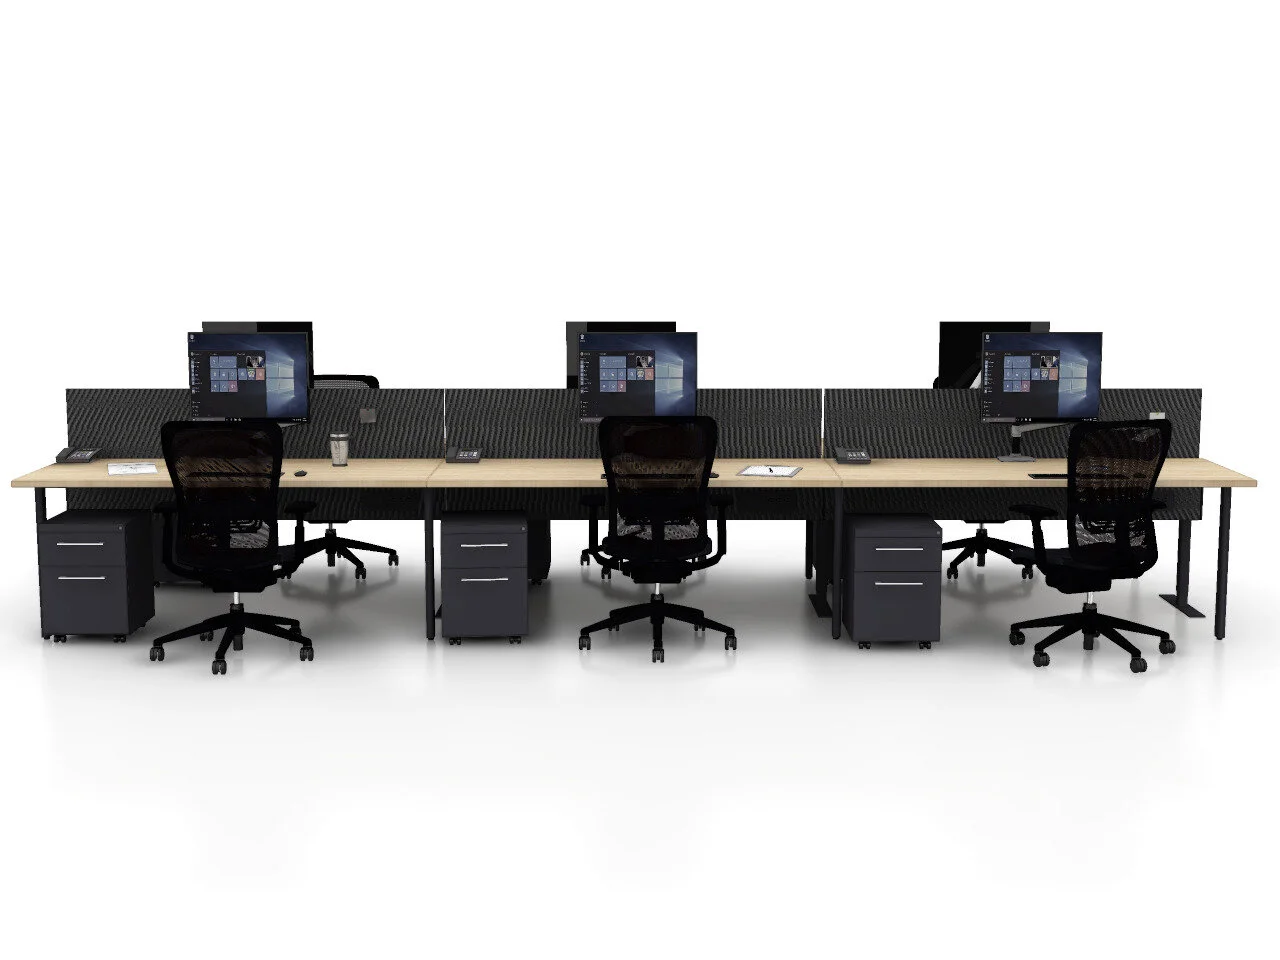
Rendering without Spotlight
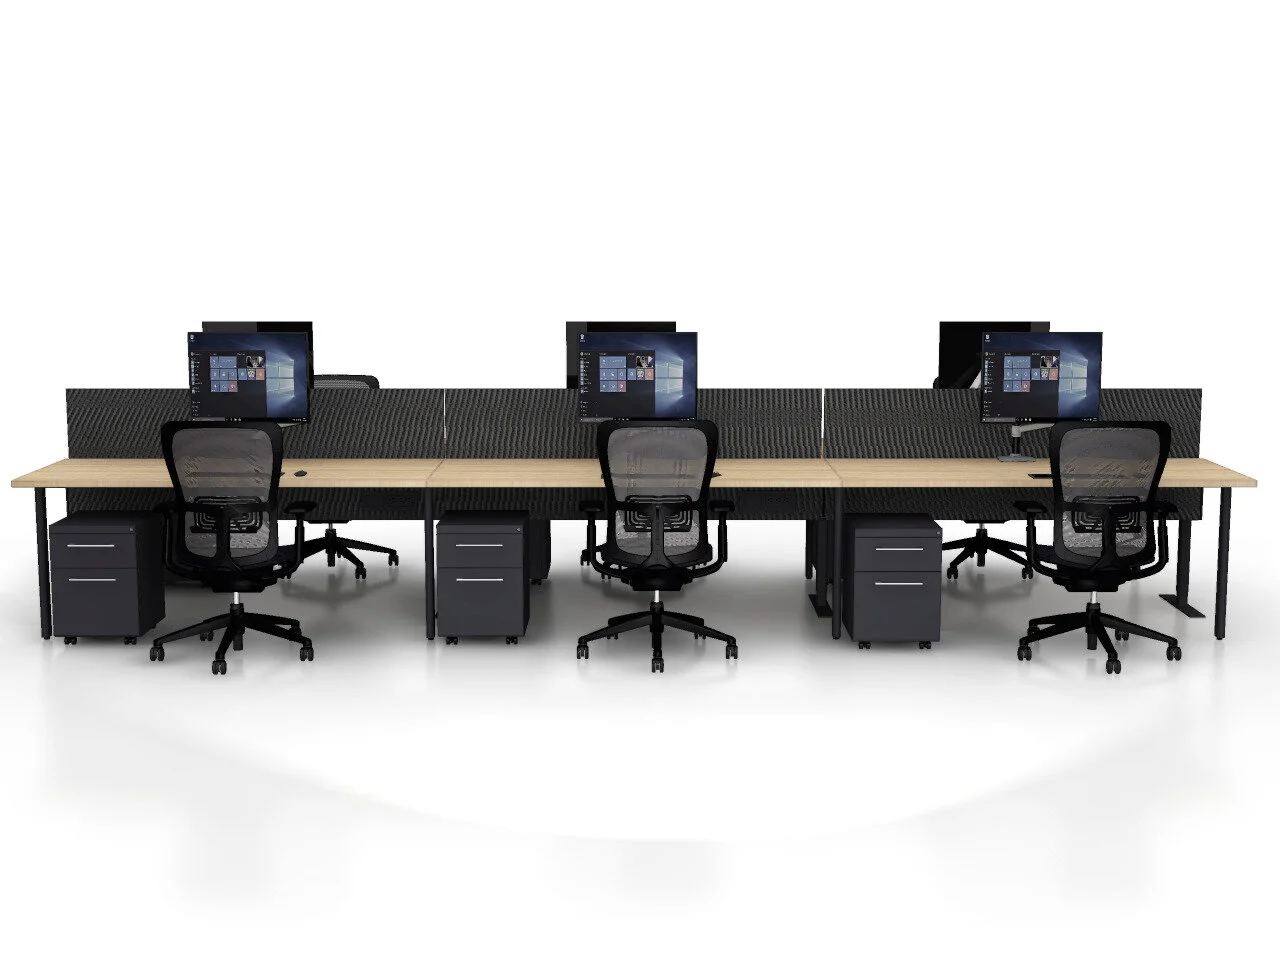
Rendering with Spotlight
(notice how the mobile peds are more defined as well)