This Blog post is going to be a simple but very handy tip: How to rotate your JPEG in Material Lab. I typically use this for wood grain laminates, but this is helpful for carpet tile, or any other finish that you want to look accurate.
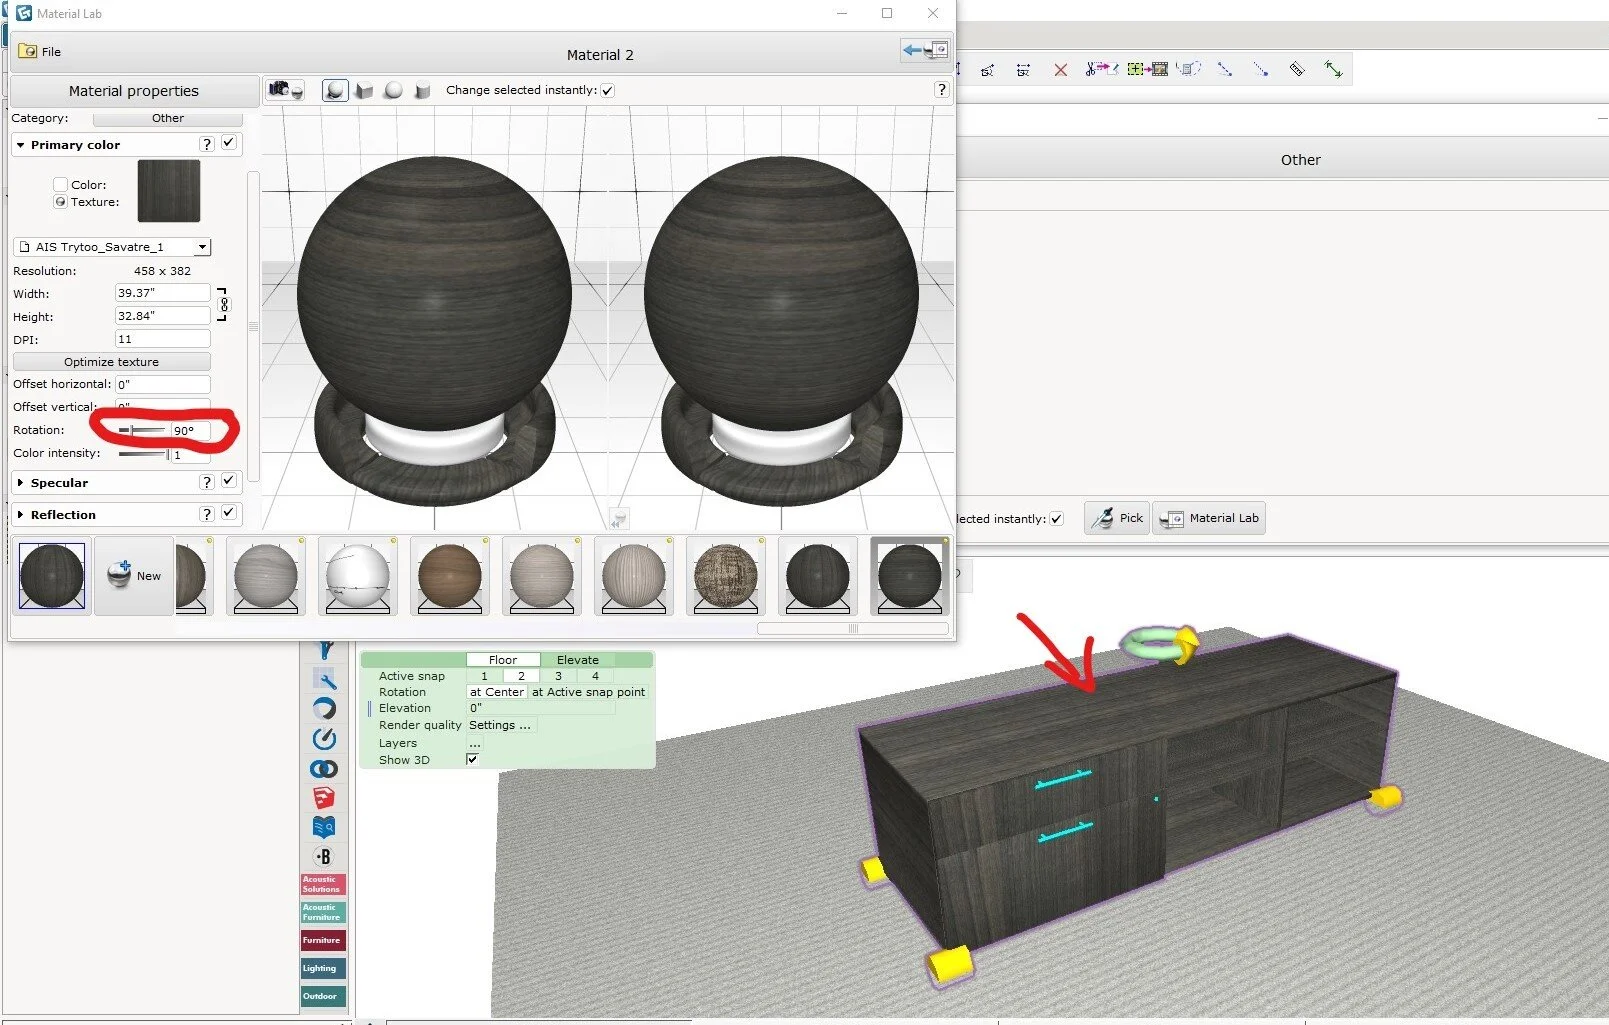
For this example, I am using a project symbol for a credenza. The wood grain needs to be vertical on the drawer fronts and horizontal on the top.
If I were to apply the laminate JPEG I have downloaded from the manufacturer’s website – everything shows as vertical on the fronts and front to back on the top (which is not accurate).
Here is how to quickly remedy that:
Step 1: Go to Material Explorer. Click on Material Lab on the bottom.
Step 2: When you pull up Material Lab:
Under the General Properties section: Name your file and select a category
Primary Color: Select Texture and click the image (Shown by the red arrow below). You can pull the JPEG from a saved location on your computer.
Under Specular, Opacity and Bump- set those settings as you see fit. (Pro Tip: If you are inserting a laminate, pull another laminate in first so you can copy the settings for reflection, etc. Same for carpets, etc).
Step 3: Click File (circled in red above) and save your material so you have a right way version saved.
Step 4: Under Primary Color, just below Optimize Texture, type 90 degrees in the rotation filed. Viola! Your image is rotated!
Step 5: Go to File and save your material with the same name but denote it is rotated. That way you can toggle back and forth between samples.
Then apply your rotated material the object in your drawing. See how that looks much better! (Well, I need to add finishes to my pulls… but you get the idea! :) )
Since these JPEG images are now saved you can go back and use them over and over.


